Contents
Chapter I
Introduction
Chapter II
Historical Sketch
Chapter III
A Walk through the Tower
Chapter IV
A Walk round the Tower
Chapter V
Tower Hill
Chapter VI
Allhallows Barking by the Tower
List of Illustrations
The White Tower (Keep).
The Byward and Bell Towers.
Top of the Portcullis in Bloody Tower.
Portion of the Armoury, White Tower.
Panorama of the Tower and Greenwich in 1548.
The Council Chamber in the King's House.
Gateway of Bloody Tower.
Middle Tower (West Front).
The Traitor's Gate, from within.
The Bloody Tower and Jewel House.
Interior of St. John's Chapel in the White Tower.
The King's House from Tower Green.
Principal Room, in the Beauchamp Tower.
Chaplain's House.
Part of a Bastion of Old London Wall.
East End of St. John's Chapel in the White Tower.
The Tower from the Tower Bridge.
The Tower from Tower Hill.
The Block, Axe, and Executioner's Mask.
A True and Exact Draught of the Tower Liberties.
The Tower from Great Tower Street
Church of Allhallows Barking by the Tower.
Sketch Plan of the Tower.
Chapter IV
A WALK ROUND THE TOWER
These manacles upon my arm
I, as my mistress' favours, wear;
And for to keep my ancles warm,
I have some iron shackles there;
These walls are but my garrison; this cell,
Which men call jail, doth prove my citadel.
– Old Ballad
On leaving the Tower gateway we turn into the gardens on the right and walk along the pathway that lies beneath Tower Hill and above the moat An excellent view is to be obtained from these gardens of the outer defences of the Tower. The western front exhibits a striking mass of buildings of various age and colour. At first glance we might imagine we were looking upon a bit of sixteenth-century Nuremberg. We would not be at all surprised to see Hans Sachs, Veit Fogner, or Sixtus Beckmesser look out from the windows above the Ballium Wall. Below lie the Casemates or outer defences, running, on this western side, from the Byward Tower to Legge's Mount, named, it is conjectured, after George Legge, Earl of Dartmouth, who had charge of the battery in the seventeenth century. The Outward Wall was put up by Henry III.
The Devereux Tower. – This tower stands at the north-west angle of the Ballium Wall, above Legge's Mount battery. Robert Devereux, Earl of Essex, and friend of Shakespeare, was a prisoner here in Elizabeth's reign, hence the name; but in earlier days it was known as Robyn the Devyll's, or Develin Tower. It is so termed in the 1597 plan reproduced at the end of this book. The lower and older portion of the tower dates back to the time of Richard I.; the upper portions are modem restorations of what had existed previously, but the arrow-slits, which formerly pierced the walls and admitted so little light to the interior of one of the gloomiest towers in the fortress, are now widened to windows. The walls are eleven feet thick, and a small staircase leads from the tower to cells lying within the thickness of the Ballium Wall. The lower floor contains an old kitchen with finely vaulted ceiling; beneath this there is a forbidding dungeon, and underground passages at one time led thence to the vaults of St Peter's Church. But the secret subways are now sealed up and their existence probably forgotten.
Flint Bowyer, and Brick Towers. – These towers lie along the northern section of the Inner Wall and are protected by the Outer Wall, and also by the comparatively modern North Bastion which projects into the ditch and is pierced for successive tiers, containing five guns each. The Flint Tower is next in order after the Devereux, and lies some ninety feet away. An older tower on this site, known as Little Hell because of its evil reputation as a prison, had fallen partly to ruin in 1796 and was demolished; the present tower was set up in its place, and, though used as a prison for a few years after the rebuilding, has practically no history as it now stands. The Bowyer Tower, next in order eastwards, was the place of confinement of the luckless Duke of Clarence, who suffered a mysterious death in 1478. The lower portions of the structure date back to Edward III.; all above is of more recent date. This tower had always an evil reputation. "One of the most terrible cells of the fortress," one authority states, "is to be found in the Bowyer Tower, where there is a ghastly hole with a trap-door, opening upon a flight of steps." From these steps a secret passage led through a small cell to a farther cell in the body of the Ballium Wall. It is possible that Scott had this tower in mind when describing the dungeon and secret passages and doors in the thirteenth chapter of the Legend of Montrose. The account of the one resembles very closely what we know of the other. The bowmaker lived and followed his trade within this tower, and it is named after that master craftsman, whose workshop was a busy place in the days before the bullet had ousted the arrow. The Brick Tower is chiefly of interest as having been the place to which Raleigh was moved during his first and third imprisonments. When it was found necessary to keep him in closer captivity than had been imposed on him in the Garden House and Bloody Tower, he was brought to the Brick Tower, and not to the cell in St John's crypt, as tradition has led many to believe. Lord Grey de Wilton died here, during his captivity, in 1617; here, also. Sir William Coventry was confined for a time in Charles II.'s time. Pepys, on his visit to Sir William, found "abundance of company with him," and sixty coaches stood outside Tower gates that had brought them thither.

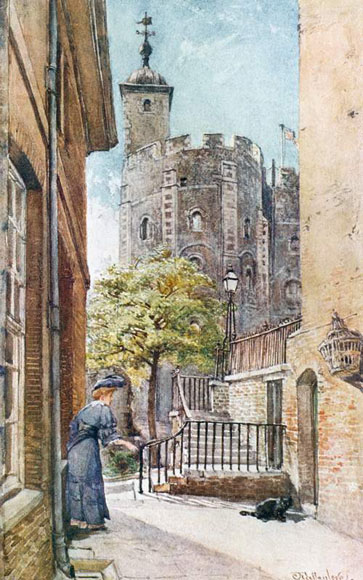
PART OF A BASTION OF OLD LONDON WALL, WITH CLOCK TOWER OF THE WHITE TOWER
The Martin Tower. – This is the most famous of the lesser towers, and is also known as the old Jewel House. It, too, in part is ancient, but the building set up by Henry III. was tampered with by Wren, and has, in consequence, a somewhat patchy appearance to-day. The tower stands at the north-east comer of the Inner Wall, and beneath it lies Brass Mount battery. It is best seen from the point where we leave the public gardens and go on to the level of the Tower Bridge Approach. From this recently constructed roadway a good general view of the Tower buildings on the eastern side is obtained. But we will pause here on our walk to consider two memorable events in the history of the Martin Tower.
In May, 1671, that audacious rascal, Colonel Blood, "whose spirit toiled in framing the most daring enterprises," after having failed to "seize his ancient enemy, the Duke of Ormond, in the streets of London," bethought him of a plan to seize and carry away the Crown Jewels of England, then kept in the Martin Tower. It was soon after the appointment of Sir Gilbert Talbot as Master, or Keeper, of the Jewels that the regalia had been opened to public inspection, and an old servant of Sir Gilbert's, Talbot Edwards, was in immediate charge of the room in which the gems lay. Blood had been making one or two visits, in various disguises, to the Jewel-room during the last weeks of April of the year mentioned (the date is sometimes given as 1678, but Evelyn mentions the affair, in his Diary, under May 10, 1671), in order to make sure of his ground and to devise plans of safe retreat Blood, in guise of a clergyman, and addressed as Parson Blood, had been invited to dine with Edwards and his wife and daughter. "You have," said the cassocked Colonel, "a pretty young gentlewoman for your daughter, and I have a young nephew, who has two or three hundred a year in land, and is at my disposal. If your daughter be free, and you approve it, I'll bring him here to see her, and we will endeavour to make it a match." The day that he had chosen to introduce his nephew was the day on which he was to make his own attempt to steal more than a maiden's heart. At the time appointed. Parson Blood returned "with three more, all armed with rapier-canes and every one a dagger and a brace of pocket-pistols." Blood and two of his associates "went in to see the crown," and the pretended "nephew" remained at the door as sentinel. Miss Edwards, with maidenly modesty, forbore to come down and meet her wooer, yet curiosity impelled her to send a waiting-maid to inspect the company and report as to the appearance of her lover. The maid, having seen whom she took to be the intended bridegroom standing at the door of the Jewel-room, returned to her mistress and analysed the impression of the young man which she had formed, with womanly intuition, by a single glance. Meanwhile, it was not love but war below. Old Talbot Edwards had been gagged and nearly strangled by Blood and his men, but not before he had made as much noise as possible in order to raise an alarm. The young women upstairs were much too interested in Cupid's affairs to hear the cries from the Jewel chamber. Edwards received several blows on the head with a mallet in order that his shouts might be silenced. He fell to the ground and was left there as dead, while the ruffians were busily despoiling the jewel case of its more precious contents. Blood, as chief conspirator, secured the crown and hid it under his cloak; his trusty Parrot secreted the orb; and the third villain proceeded to file the sceptre in order to get it into a small bag. At that moment a dramatic event upset their calculations. One can almost hear the chord in the orchestra and imagine that a transpontine melodrama was being witnessed, when told that there stepped upon the scene, at this juncture, a son of Talbot Edwards who had just returned from Flanders. Young Edwards, on entering his own house, was surprised by the sentinel at the door asking him what his business might be. He ran upstairs, in some amazement, to see his father, mother, and sister, and ask the meaning of this demand. Blood and his precious suite of booty-snatchers received the alarm from the doorkeeper, and the interesting party made off as quickly as they could with cloaks, bags, pockets, and hands full of Crown jewellery, the property of His Majesty King Charles and the English nation. Old Edwards had now recovered his powers of speech, and, working the gag out of his mouth, rose up to shout "Treason! Murder!" and so forth. This was heard by those above who had been welcoming young Edwards' unexpected return. All were now active, and young Edwards, assisted by some warders, gave chase to the rapidly retreating regalia. The Blood contingent had already reached the Byward Tower and were making for the outer gateway when some of the King's jewels were dropped in order to lighten the burdens of those who ran. But the Colonel still hugged the crown. They were soon out on Tower Wharf and making for St Catherine's Gate (where the northern end of Tower Bridge now stands). Here horses awaited them, and here they were aware that shouts of "Stop the rogues!" were proceeding from an excited body of men rushing towards them from the western end of the Wharf. The gallant Colonel did not resign the crown without a struggle, during which several of the jewels, including the Great Pearl and a large diamond, with which it was set, rolled out upon the ground and were for a time lost, but subsequently recovered. Parrot was found with portions of royal sceptre in various linings and pockets, and a valuable ruby had been successfully conjured away. When Blood and his three tragic comedians had been made prisoners, young Edwards hastened back into the Tower and acquainted Sir Gilbert Talbot with the alarming news. Sir Gilbert stamped and swore a round oath or two and hurried to the King to give him an account of the escapade. Charles commanded the prisoners to be brought before him at Whitehall, and the Merry Monarch endowed Blood with a pension of £500 a year. The second Charles evidently admired a man of daring.
The Seven Bishops were confined – huddled together would be the more literal term – in the Martin Tower, during the troublous days of James II., for refusing to subscribe to the Declaration of Indulgence. "A warrant was issued for their committal to the Tower," we are told by Dr. Luckock in his Bishops in the Tower and "the spectacle of the 8th of June [1688] has had no parallel in the annals of history. It has often been painted, and in vivid colours, but no adequate description can ever be given of a scene that was unique." As the barge containing the Bishops was pushed off from Whitehall Steps, "men and women rushed into the water and the people ran along the banks cheering with the wildest enthusiasm, and crying, 'God bless the Bishops!' When they reached the Traitor's Gate and passed into the Tower, the soldiers on guard, officers as well as men, fell on their knees and begged for a blessing. It was evening when they arrived, and they asked for permission to attend the service in the chapel [of St. Peter]; and the Lesson for the day, by a happy coincidence, was one well calculated to inspire them with courage: 'In all things approving ourselves as the ministers of God, in much patience, in afflictions, in necessities, in distresses, in strifes, in imprisonments.' The enthusiasm was continued long after the ponderous gates of the Tower had closed upon them. The soldiers of the garrison drank to the health of the Bishops at their mess, and nothing could stop them from such a manifestation of their sympathy." The Bishops were in the Martin Tower until June 15, when they returned by water from the Wharf and were taken to the Court of King's Bench. They were tried on June 29. When Sir Robert Langley, foreman of the jury, declared that the prisoners were found "not guilty" the scene again became one of the wildest joy and excitement. "The released Bishops, hearing the bells of a neighbouring church, escaped from the crowd to join in the service, and, by a second coincidence, more striking even than the first, the Lesson that they heard was the story of St. Peter's miraculous deliverance from prison."
The Constable, Broad Arrow, and Salt Towers. – These small towers stand on the line of the eastern wall of the Inner Ward and face the Tower Bridge roadway. In the first named the Constable of the Tower lived in Henry VIII.'s reign; in the time of Charles I. it was used as a prison. Its rooms and dungeons resemble those of the Beauchamp Tower, but are on a smaller scale. The Broad Arrow Tower never lacked prisoners during the reigns of Mary and Elizabeth, and the room on the first floor has some inscriptions left by captives; these writings on the stone have been so repeatedly covered with whitewash that they are now somewhat difficult to decipher. In 1830 a list of the inscriptions was made, and we find in it the following names and dates: "John Daniell, 1556," a prisoner concerned in a plot to rob the Exchequer in Mary's reign, and hanged on Tower Hill; "Thomas Forde, 1582," a priest executed "for refusing to assent to the supremacy of Queen Elizabeth in the Church"; "John Stoughton, 1586," and "J. Gage, 1591," both priests. At the top of this tower, near the doorway giving access to the Inner Wall, is a narrow cell, with only a small aperture to admit light, which rivals Little Ease in sparsity of accommodation. Behind the Constable and Broad Arrow Towers are the Officers' Quarters of the garrison, occupying ground on which stood, until the reign of James II., an old building known as the King's Private Wardrobe, connected with the now vanished Royal Palace. South-west of the Broad Arrow Tower lay the Queen's Garden.
The Salt, Cradle, and Lanthom Towers. – The Salt Tower, standing at the south-east corner of the Ballium wall, is one of the oldest portions of all the buildings, and dates back to the time of William Rufus. It possesses a spacious dungeon, with vaulted ceiling, a finely carved chimney-piece in one of the upper rooms, and in a prison chamber the inscription of "Hew:Draper, 1561" – the memento of a sixteenth-century magician – is cut on the wall The Salt and Cradle Towers were the scene of an escape of two prisoners in Elizabeth's reign – Father Gerard and John Arden.
EAST END OF ST. JOHN'S CHAPEL IN THE WHITE TOWER, FROM BROAD ARROW TOWER
Gerard had been put in the Salt Tower for the part he is said to have taken in an attempt on the Queen's life. When examined before a Council which sat in the room in the King's House where Guy Fawkes was afterwards convicted, he refused to give any information that might involve brother priests. For this he was ordered to be tortured in the dungeon under the White Tower. In the account which he himself wrote of the proceedings we are told that he and his guards "went in solemn procession, the attendants preceding us with lighted candles because the place was underground and very dark, especially about the entrance. It was a place of immense extent, and in it were ranged divers sorts of racks, and other instruments of torture. Some of these they displayed before me and told me I should have to taste them." Gerard was led to "a great upright beam, or pillar of wood" in the centre of the torture chamber, and there hung up by his hands, which were placed in iron shackles attached to an iron rod fixed in the pillar. The stool on which he had stood while this was being done was taken away from under his feet and the whole weight of his body was supported by his wrists, clasped in the gauntlets. As he was a tall, stout man his sufferings must have been terrible indeed. While he hung thus he was again questioned as to his associates in the "plot," but he refused to betray any one. He has left on record his sensations as he hung against the pillar of torture, "I felt," he says, "that all the blood in my body had run into my arms and begun to burst out at my finger-ends. This was a mistake, but the arms swelled until the gauntlets were buried in the flesh. After being thus suspended for an hour I fainted; when I came to myself I found the executioners supporting me in their arms." They had replaced the stool under his feet, and poured vinegar down his throat; but as soon as he recovered consciousness the stool was withdrawn and Gerard allowed to remain hanging in agony for five hours longer, during which he fainted eight or nine times. For three days he was put to this torture on the pillar, and Sir William Waad, then Lieutenant of the Tower, exasperated at the victim's fortitude, exclaimed at last, "Hang there till you rot!" and he was left hanging till his arms were paralysed. Each evening the victim, "half dead with pain, and scarce able to crawl," was taken back to his cell in the Salt Tower. A few days later Gerard was again brought before the Council, and again refused to compromise others. Waad thereupon delivered him to the charge of the chief of the torturers – a dread official indeed – with the injunction, "You are to rack him twice a day until such time as he chooses to confess." Once more he was led down into the dungeon beneath the White Tower and strapped up to the pillar as before, his swollen arms and wrists being forced into the iron bands which could now scarce go round them. Still he refused to give the name of a single friend, and Waad saw the futility of torturing him to death. Grerard was locked up in the Salt Tower again and lay on the floor of his chamber with maimed arms, wrists, and hands, terrible to look upon. Yet he remained firm, and the pains of the body could not, it seemed, affect his spirit. It happened that in the Cradle Tower, standing to the south-west of the Salt Tower, on the outer wall and close by the Wharf, another Roman Catholic prisoner, John Arden, was kept in confinement. Grerard, when sufficiently recovered to be able to walk about again, obtained leave of his jailor to visit Arden. Together they planned escape. They wrote to friends in the City with orange juice, which writing was invisible unless subjected to a certain treatment whereby it became legible. Gerard, by the help of these friends, secured a, long piece of thick string with a leaden weight attached, and with this came a written promise that upon a certain night a boat would lie beside the Wharf just under the Cradle Tower. On the evening of the day appointed Gerard stayed longer than usual with Arden, but dreading lest at any moment he should be sent for and taken back to the Salt Tower. But night came and he was still in the Cradle Tower, looking out anxiously across the moat towards the riverside. At last the boat approached, and was moored opposite the tower, from which Arden threw his line, and both prisoners saw, with joy, that the leaden weight had cleared the moat and fallen on the Wharf. It was picked up by the boatmen, and a strong rope was fastened to the cord. This rope Arden hauled up into his cell and made it fast Gerard then swarmed down the tightened rope to the Wharf, suffering acute pain owing to the condition of his arms and wrists. It was five months after his torture before the sense of touch was restored to his hands. Arden followed, and both got away safely to the steps beside London Bridge, where they were met by the friends who had cheered them in their captivity, and were taken to a place of safety.